

|
|
|
|
Harley Hahn's
File Sharing
Le petit guide
Master List
•
Top Usenet
•
Top Usenet
|
HARLEY HAHN'S USENET CENTER File Sharing Tutorial
Perhaps you are familiar with the convention of a programmer including a README FILE file (often named readme.txt) with a software distribution. The readme file contains information you should read before you install the program. Usenet has a similar convention. Whenever you upload a binary file large enough to be broken into parts, you should also include a special information file. Such files contain plain text and are given the file extension nfo (for "information"). Thus, they are referred to as NFO files. In our example, we are sharing the file steal-this-film-2.avi, which contains a video entitled Steal This Film, Part II. So along with the various other files (RAR, SFV, PAR2), we should also include an NFO file named steal-this-film-2.nfo. An NFO file serves two purposes. First, it describes the file we are uploading. This helps someone who may not be sure if he really wants to download a large binary file and all its parts. In such cases, he can download the NFO file and read it (a quick operation) and then decide whether or not he wants the binary file. In our example, someone could look at our NFO file and decide whether or not he or she wants to bother downloading the video. The second use of an NFO file is to provide information that will help someone use or understand the contents of the binary file being shared. For example, the NFO file for our video will contain important technical information that will be needed to play the video properly. When a computer program is being shared, it's NFO file may describe the hardware and software requirements to run the program. Since NFO files are plain text you can, in principal, create them yourself with a text editor. In practice, however, it's a lot easier — and you will get better results — if you use a special purpose NFO-creation program. The one I recommend is a freeware program, COOL BEANS NFO CREATOR. The reason I like Cool Beans NFO Creator is that it is quick and easy to use. All you do is fill out a series of forms. As you type information, the program creates an NFO file automatically, which you can preview it any time. When you are finished, all you have to do is save the file. In order to fill out the forms, you will need technical information about the file you are planning to share. (I'll show you an example below.) If you are sharing a media file — such as a photo, music file, or video — the easiest way to get such information is to use a special program to extract technical data from the original file. The program I recommend to do the job is MEDIAINFO. Like Cool Beans NFO Creator, MediaInfo is free software. As I mentioned above, NFO files contain plain text, so you can read them with any text editor (for example, Notepad, the built-in Windows editor). However, you will find that reading NFO files works best with a special-purpose NFO-display program. The one I recommend is a free program called GETDIZ. One important feature of GetDiz is that it especially good at rendering ASCII ART, that is, pictures created by using the printable characters of the Ascii code. Ascii art looks cool and is used a lot within NFO files. In such cases, the NFO file will look a lot better if you view it with GetDiz, than if you view it with a regular text editor. If Ascii art is new to you, here is an example showing my cat Little Weedly, with his name spelled out in large letters. (If you want to see Little Weedly's Web site, click on the picture.) 
In a moment, I'll show you how to create an NFO file. If you want to follow along on your own computer, take a moment now to download and install the three programs we discussed.
Cool Beans NFO Creator download site:
MediaInfo download site:
GetDiz download site: Before you start to build the NFO file, it's best to get the technical information ready. To do so, we will use MediaInfo. (If the file you are sharing is not a media file, you can skip this step.) To begin, start the MediaInfo program. Before you do any work, pull down the View menu and select the Tree option. This will display the information in a a hierarchical (tree-like) format that is easy to understand. 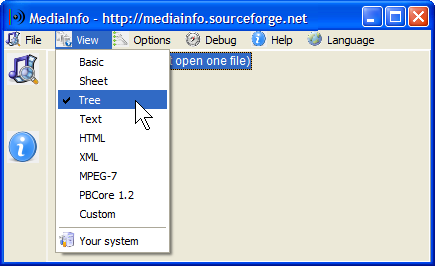
To start, you need to select the media file for which you want information. Pull down the File menu, select Open and then File: 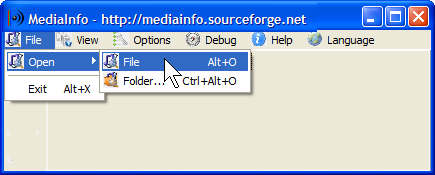
You will now see a window containing a file list. Navigate to your file sharing directory (folder), select the media file for which you want information (in our example steal-this-film-2.avi), then click on the Open button. 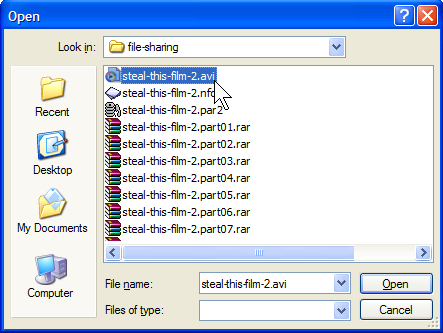
MediaInfo will now display the technical information about this file. We will use this information in a minute. 
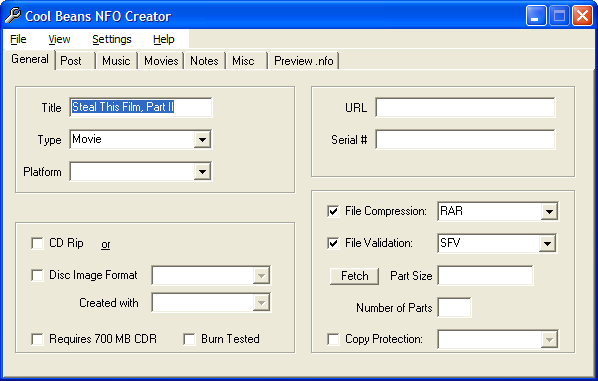
In another window, start Cool Beans NFO Creator program (see the screenshot below). Underneath the menu bar, you will see seven tabs: General, Post, Music, and so on. The idea is to click on each tab in turn, and fill in as much information as you can. You can then preview the NFO file and, if you like what you see, you save the file. Start with the General tab, and fill in whatever information you have. In our example, I have filled in the title and the type of file (a movie). I have also clicked on File Compression (selecting RAR), and File Validation (selecting SFV), to indicate that we are uploading RAR files and including an SFV verification file. |
|
|
|
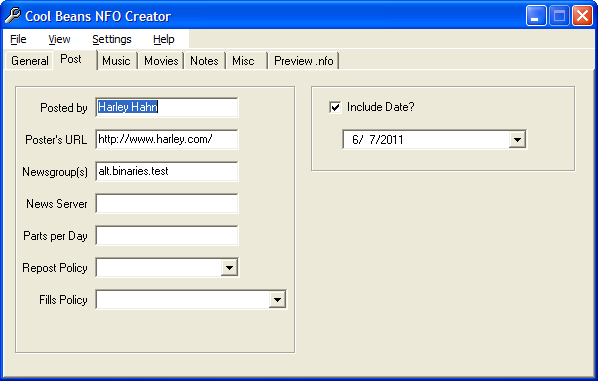
Next, click on the Post tab. This form contains information related to the uploading (posting) of the file to be shared. In our example, I have specified my name, the URL of my Web site, the date, and the newsgroup to which we are going to post the file. |
|
|
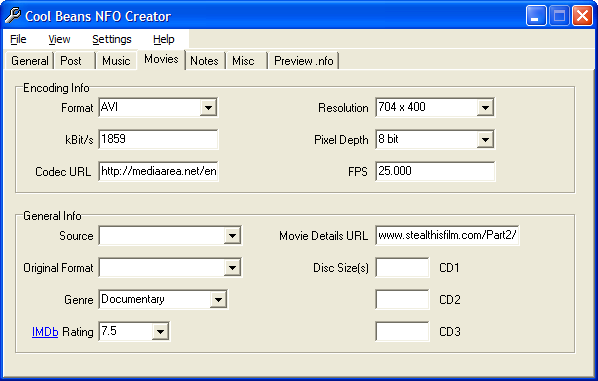
Notice that I have specified the newsgroup alt.binaries.test. This is a special newsgroup used only for testing. You can upload anything you want to this group and no one will care. Normally, of course, you will want to post your files to a newsgroup where other people will find them and download them. There are many binary groups used for file sharing, so you will have to pick the one you think is best. How do you choose such a group? One idea is to search for files similar to the one you want to share, see which newsgroups you find them in, and choose one of those groups for posting your own file. Alternatively, you can always post to alt.binary.boneless, a very active newsgroup used for all types of file sharing. (The name boneless has no particular meaning.) We'll talk more about this important topic later in the tutorial. If you are uploading music or a video, the next step is to click on the appropriate tab, Music or Movies. In the example below, I have clicked on the Movies tab because we are sharing a video. Once the form is displayed, fill in whatever information you know about the file. For a video, the Encoding Info section is especially important. The General Info section is optional, but it is nice to include as much as you can. For our sample file, I found the information for the Encoding Info by using the MediaInfo program (see the MediaInfo screenshot above). I also added two other pieces of information. First, I found the URL of the Web page that has information about the video. Second, I looked up the movie on the IMDB (Internet Movie Database) Web site, so I could specify its rating. |
|
|
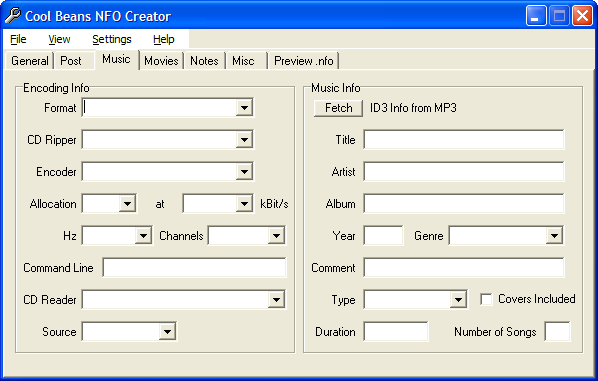
If you select the Music tab instead of the Movies tab, you will see the form below. Within the Encoding Info section, the most important information to specify is Format, kBits/s (bit rate), Hz (sampling rate), Channels , and Source (if you know it). Within the Music Info section, the most important sections are Title and Artist, but you should try to fill in as much information as you can. With an MP3 file, you can click on the Fetch button to extract information automatically from the file itself. |
|
|
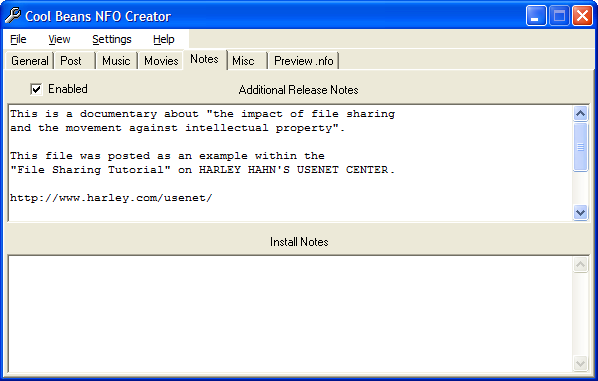
Once you have filled out the Music or Movies information, the last form to fill out is the Notes tab. This form is used to insert your own remarks to the NFO file. For our example, I decided to enter the following notes.
This is a documentary about "the impact of file sharing
To enter notes, click on the Enabled checkbox. Then type as many lines as you want. You can see part of the text in the screenshot below. Hint: If you are uploading software, make it a point to enter installation information in the Install Notes area. |
|
|
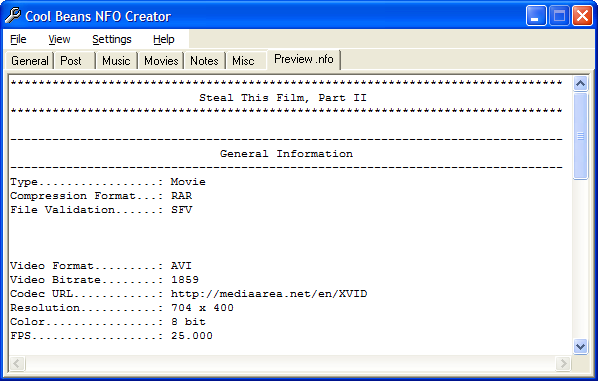
Finally, you can preview the NFO file by clicking on the Preview .nfo tab. In the screenshot below, you can see the top part of the NFO file we have just generated. |
|
|
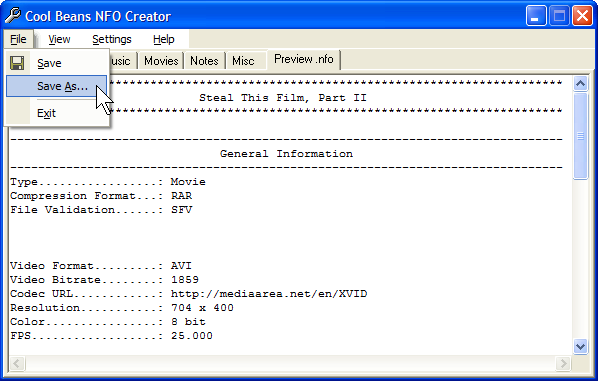
Once you are satisfied with your NFO file, you are ready to save it. Pull down the File menu and select Save As. |
|
|
Navigate to your file-sharing directory (folder) and save the NFO file under an appropriate name. In our case, the name of the file will be steal-this-film-2.nfo. 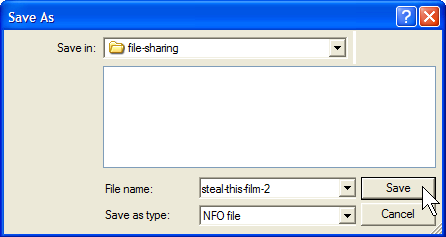
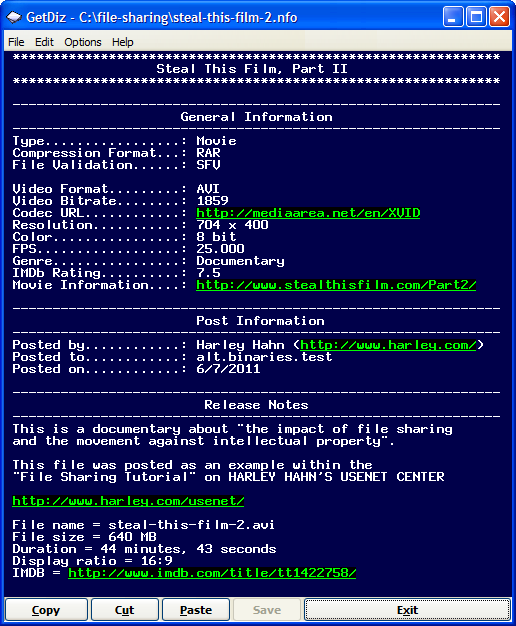
Having created an NFO file and saved it in your file sharing-directory, you can use the GetDiz program to display the entire file. The screenshot below shows you what our NFO file would look like to a user who has downloaded and displayed it with GetDiz. Note: The white-on-blue coloring you see below is the GetDiz default for displaying NFO files. The colors are not actually part of the file. |
|
|
At this point, our NFO file is ready. You can close the three programs you just used (MediaInfo, Cool Beans NFO Creator, GetDiz). In a moment, we will move on to the final step in the uploading process. Before we do however, we need to take a few minutes to talk about two important topics: yEnc files and NZB files.
© All contents Copyright 2025, Harley Hahn
|