

|
|
|
|
Harley Hahn's
File Sharing
Le petit guide
Master List
•
Top Usenet
•
Top Usenet
|
HARLEY HAHN'S USENET CENTER File Sharing Tutorial
During this tutorial, we have been discussing the steps necessary to share a large video file named steal-this-film-2.avi. To upload the files, we are using a Usenet posting program called Camelsystem Powerpost. In the last section, we configured the program. In this section, we will take the last step by uploading all the files necessary to share the video. If you want to follow along on your own as you read this page, please take a moment to download and install Camelsystem Powerpost:
Camelsystem Powerpost download site:
Hint: After you navigate to the download page, you will have a choice of what to download. Choose the "setup" download in English. As we discussed earlier in the tutorial, to share a single, large binary file we actually share a set of files: RAR files, an SFV file, PAR2 files, an NFO file, and an NZB file. So far, we have generated all but the NZB file, which will be created and uploaded automatically as part of the uploading process. In our example, this gives is a total of 56 files. Interestingly enough, the 56 files we will be sharing have a total size of 705 MB, which is about 10 percent larger than the original file (639 megabytes). This is an important characteristic of Usenet file sharing, which I want you to understand. Even when we compress the original data by using RAR files, the overhead in Usenet file sharing is such that we usually upload more data than is contained in the original file. In our example, it is about 10 percent more, which is typical. The table below contains information about all 56 files. Before we move on, take a look at the table to remind yourself of the purpose of each type of file. |
|
|
The 56 Files to Be Shared
|
||||||||||||||||||||||||||||||||
|
When you start Camelsystem Powerpost, you will see a window like the one below. The first time you use the program, you need to take a few minutes to specify the various settings the program will need to connect to your news server and post articles for you. To do so, pull down the Options menu and select Program settings. This is what we did in the previous section. 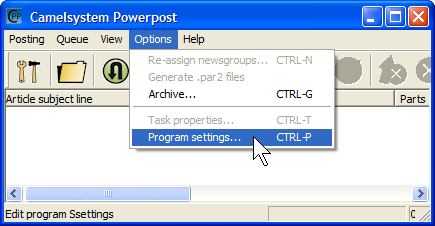
Once you enter the program settings, they are stored permanently, so there is no need to specify this information again unless something changes. For example, you would modify the setting if you get a new login password, or if you want to add a new newsgroup to your list. From now on, whenever you run Camelsystem Powerpost, you can jump directly to next step: posting your files to Usenet. Camelsystem Powerpost: Posting Files to UsenetOnce you have specified the program settings, you are ready to select the files you want to post (upload). To do so, pull down the Queue menu and select Add files to queue. (The "queue" is the list of files to be posted.) 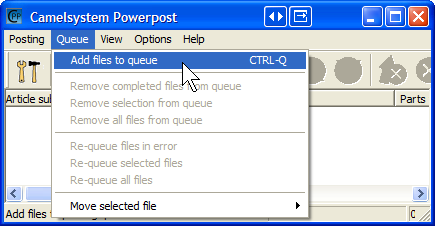
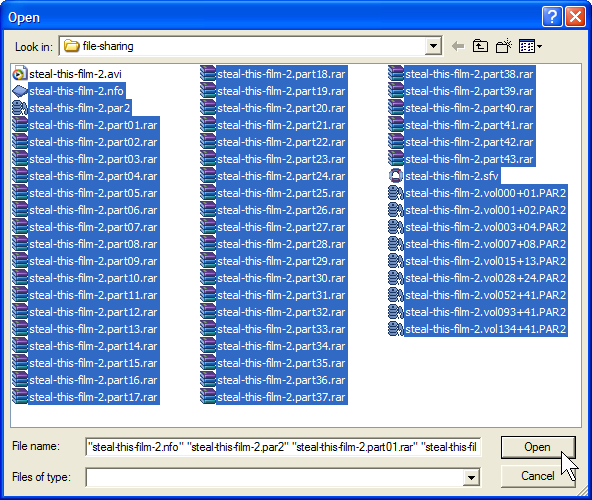
A new window will appear to enable you to select the files to be uploaded. Simply navigate to the folder (directory) that holds your files, and select what you want. In the example below, you will notice that I have selected all the files in the folder except the original AVI file. This is important: Do not select your original file if it happens to be stored in the same folder as the files you have generated. What you want to select are the NFO, PAR2, RAR and SFV files. (The reason you don't see the NZB file is because it has not yet been created. This will be done automatically by the Camelsystem Powerpost program.) |
|
|
Once you have selected the files to be uploaded, click on the Open button. You will now specify a few choices and specifications needed before the posting process begins. You will see a window like the one below. In our example, you can see on the title bar that we have just added 55 files to the queue. (File #56 is the NZB file that has yet to be created.) This window has four tabs. We'll start with Subject. 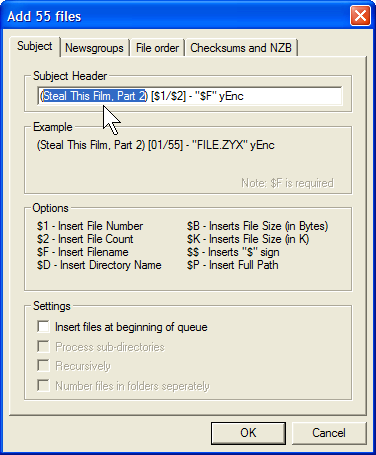
The Subject tab contains information that will be used the create the Subject lines for the files that are about to be posted. Specifically, you need to specify the "Subject Header". The first time you use the program, you will see a default value like the one shown below. 
As you can see, most of the Subject Header is filled in for you automatically. All you need do is replace the four question marks within the parenthesis, by typing a descriptive name. In our example (see the large screenshot above), I typed Steal This Film, Part 2. Notice that I left the parentheses intact. This is important. Important: Do not change the rest of the Subject Header unless you know what you are doing and have a good reason to override the default. Once you have specified the Subject Header, click on the Newsgroups tab. You will see a window like the one below. At this point, you need to specify the Usenet newsgroup to which you want to post your files. 
When you send a Usenet article to more than one newsgroup, it is called CROSS POSTING. Cross posting is occasionally used with Usenet discussions, when a particular article may be of interest to more than more than one group. However, cross posting should never be used when sharing files. As a general rule, you should never upload the same files to more than one newsgroup. In our example, I have chosen the group alt.binaries.test, the newsgroup that is used specifically for testing and practicing. The first time you share a file, I suggest that you send it to this group, just to see how it works. Normally, when you are not practicing, you would pick one of the other groups in the list. If you are not sure which group to use, you can post to alt.binaries.boneless or alt.binaries.misc. As we discussed earlier, boneless is a high-traffic newsgroup used for general file sharing. It is, by far, the most widely used Usenet file sharing group. The misc group is similar, but has much less traffic. There are a great many different file sharing groups, hundreds in fact. To help you choose the right group, take a look at the table below. I have included the groups in the list above, as well as several others that are particularly popular. If you want to post to a group that is not in the default list, you can add it for yourself. (Notice the Add new newsgroup button in the screenshot above.) Notice that I have not included alt.binaries.ftd and alt.binaries.nl. These two groups are of interest only to users from the Netherlands. The reason they are included in the default list is that Camelsystem Powerpost is maintained by Dutch programmers. Popular File Sharing Newsgroups
Once you have specified the Subject Header, click on the File Order tab. You will see a window like the one below. This window allows you to modify the exact order in which the files will be posted to your Usenet server. 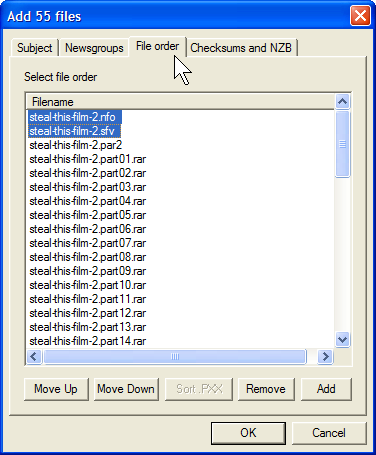
For two reasons, I recommend you move the NFO file and SFV file to the top of the list, which will cause them to be uploaded before the data files. First, even before all the files are fully uploaded (which can take a long time), people will be able to download your NFO file and see what you are sharing. If they like it, they can use your NZB file to initiate a download. Second, once people have your SFV file, they can use it to verify that correctness of the data files as they arrive, one at a time. (Downloading large files is a slow process.) Note: As we will see in a moment, when the NZB file is generated, it will be inserted automatically above all the other files. To continue, click on the checksums and NZB tab. This will display a window that allows you to specify whether or not you want the program to create SFV, PAR2 or NZB files. 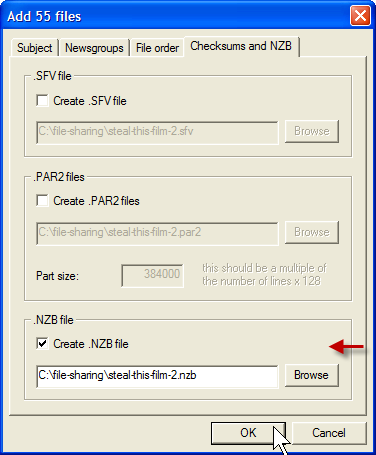
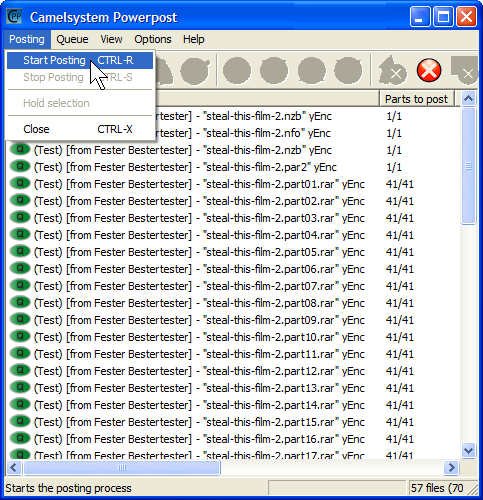
In our case, we already have the SFV and PAR2 files. However, you will always need the program to create an NZB file for you, so make sure that this box is checked (see the red arrow). Our preparation is now complete. Click on the OK button to return to the main window. Then pull down the Posting menu, and select Start Posting. Notice that the NZB file has been created for us: it is at the top of the list. |
|
|
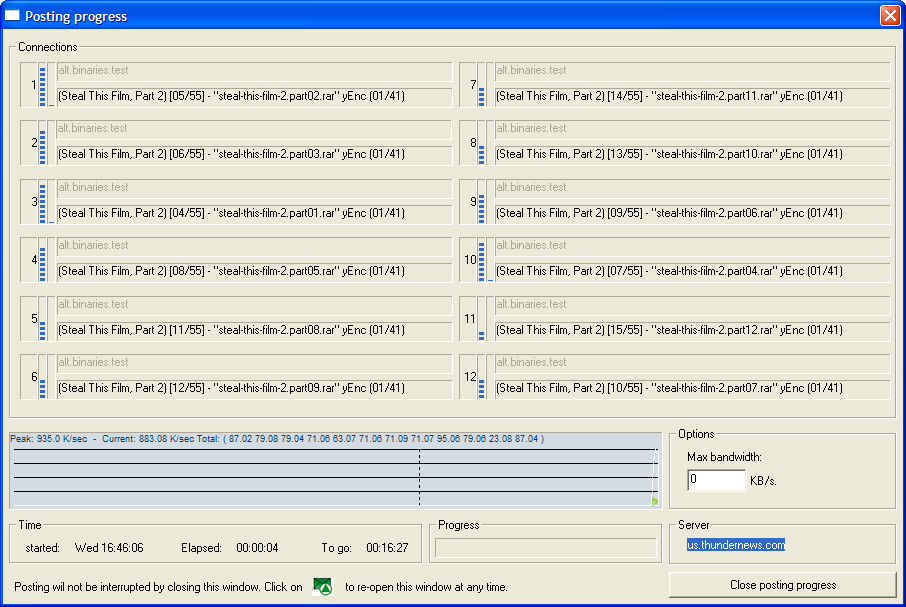
As soon as the posting begins, the program will display a large window called "Posting Progress". Within this window, the program shows you information about each of the various files currently being uploaded. In our example (below), 12 files are being uploaded at the same time. This is because, within the program settings, we specified we wanted the maximum 12 connections. If you are trying to work at the same time and your computer is slowed down too much, you may have to lower the number of connections. |
|
|
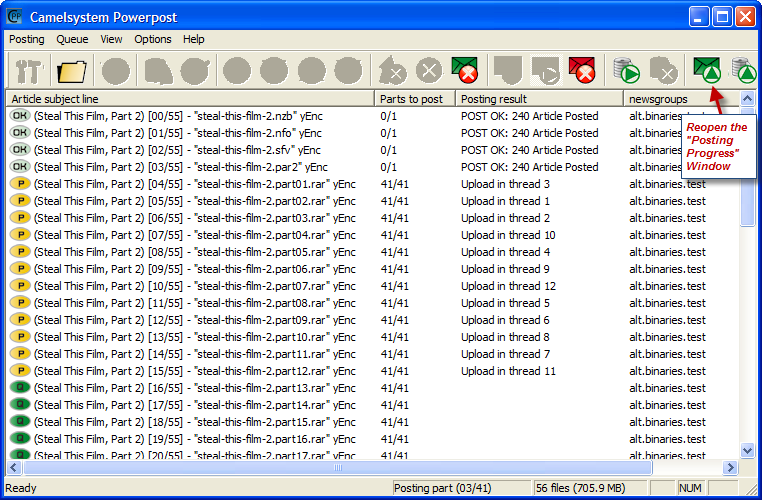
Since uploading the files can take a while, you will probably want to close this window. (Just click on the "X" in the top right-hand corner of the window.) You will then be returned to the main window, where you will see a list of all the files, along with a summary. You can reopen the "Posting Progress" window whenever you want by clicking on the green envelope with the green triangle near the top-right of the window. (See the screenshot below.) In the example below, you can see that the first 4 files have uploaded successfully (NZB, NFO, SFV, and PAR2 info); the first 12 PAR2 files are currently being uploaded; and the rest of the files are waiting in the queue. If you want to do other work while the files are uploading, do not close this window as it will stop the program. Instead, minimize the window to shrink it out of the way. The program will continue working silently in the background. (See the hint below.) |
|
|
— hint — If you minimize the Camelsystem Powerpost window, the program will disappear, but will keep running in the background. Just click on the Minimize button near the top right-hand corner of the window. 
To be as unobtrusive as possible, the program will not minimize to the task bar, where it might get in your way. Instead, you will see a small icon in the area to the right of the task bar (see below). In Windows 7, this area is called the Notification Area; in Windows XP, it is the System Tray. 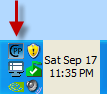
To reopen the window, all you have to do is click on this icon. In my experience, the icon is sometimes a bit hard to see, so here is an enlarged picture, so you know what to look for. 
At this point, your work is done. All you have to do is wait for Camelsystem Powerpost to finish uploading your files to the Usenet server. Once all the uploading is finished, your postings will begin to propagate from one Usenet server to another and, within a short time, your files will be available to Usenet users around the world.
© All contents Copyright 2026, Harley Hahn
|
