

|
|
|
|
Harley Hahn's
File Sharing
Le petit guide
Master List
•
Top Usenet
•
Top Usenet
|
HARLEY HAHN'S USENET CENTER File Sharing Tutorial
One of the problems than can occur when you are sharing files is that some of the data can become corrupted (that is, changed). This can happen for a variety of reasons, for example, a transmission error, a software problem, or a read or write error when accessing a disk. With a binary file, data corruption can be serious, sometimes rendering the entire file unusable. Because of this potential problem, it is common for people who upload files to include a special file that can help detect whether there is any data corruption within a set of downloaded files. Such a file is called an SFV FILE. (The name stands for "simple file verification".) Aside from being used with Internet downloads, SFV files are often used for file verification when copying a disk or when burning a CD or DVD. When you upload files, it is considered courteous to include an SFV file. This will enable anyone who downloads your files to make a quick check as to whether or not all the data came through correctly. Even if you don't use SFV files when you download, it is a good idea to include one when you upload. Remember, you are sharing with people around the world, some of whom may not have high-quality Internet connections and may need an SFV file to check for transmission errors. The SFV system works by creating what are referred to as a "CRC32 checksums", one for every data file. Each CHECKSUM is an 8-byte hexadecimal (base 16) number that is generated when the data in the file is processed using the CRC32 algorithm. For example, here is the checksum for the first RAR file we generated in the previous section of the tutorial. Checksum for steal-this-film-2.part01.rar = 37DB1B81 Checksums are stored within an SFV file, one per line. (I'll show you an example of such a file in a moment.) The mathematics behind CRC32 checksums is complicated, and you don't need to care about the details. The important point to know is that an SFV program can look at a data file and its corresponding 8-byte checksum, and tell you quickly whether or not the data has been corrupted. (That's actually an amazing concept, if you think about it.) The major disadvantage of SFV files is that they only detect errors; they can't be used to fix errors. (That is the job of PAR2 files, which we will cover later in the tutorial.) However, SFV files are small, easy to generate, simple to use, and dependable. There are a variety of programs you can use to create an SFV file. The one I recommend is QUICKSFV (usually spelled QuickSFV), because it is free, works quickly, and is easy to use. If you want to follow along on your own as you read this page, please take a moment now to download and install QuickSFV.
QuickSFV download site: Once you have QuickSFV installed, generating an SFV file is easy. To start, open your file manager (Windows Explorer), navigate to the directory (folder) that contains your files, select all the RAR files, and right-click. You will see the standard context menu. All you have to do is click on Create .SFV file. QuickSFV will process RAR file in turn, generating a CRC checksum. When it is done, QuickSFV will create an SFV file to hold all the checksums. In the screenshot below, I have selected all the RAR files, and I am just about to start QuickSFV. Be sure that you select only the files you want to upload (the RAR files). Do not select the original file (in this case, the AVI file). 
Before QuickSFV starts to work, it will display a window showing you the name of the SFV file it is about to create. The default is the filename of the first file in the set, with an extension of sfv. 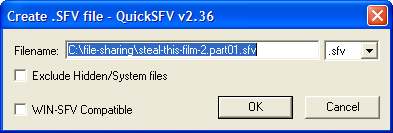
The best name to use is the filename of the original file, not the name of a RAR file. So take a moment to edit the filename by deleting the superfluous characters (in this case, .part01). Then click on the OK button to continue. 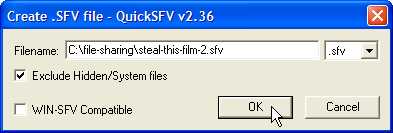
You can watch as QuickSFV processes each file: 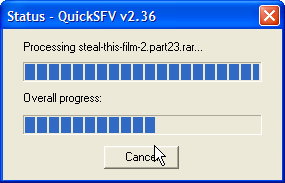
Once QuickSFV is finished, you will see the newly created SFV file in your directory. At this point, before you upload anything, you should take a moment to test the file. To do so, simply double-click on it. 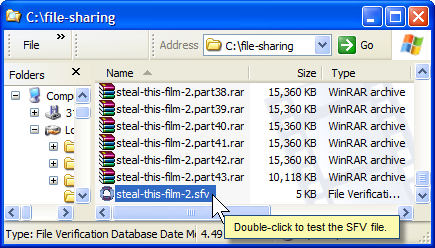
QuickSFV looks in the SFV file and finds the list of all the data files and their corresponding checksums. QuickSFV will then read each data file, calculate a new checksum, and make sure it matches the checksum in the SFV file. In the screenshot below, you can see the results of such a test using the SFV file we just generated: all the checksums match up correctly. 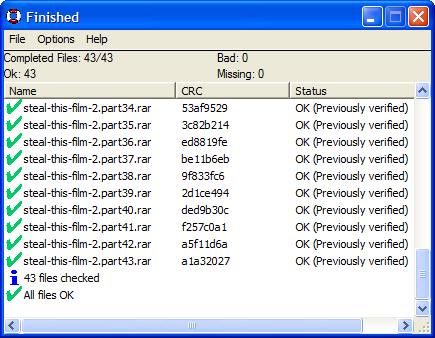
Normally, you don't need to care about the contents of an SFV file. Your SFV program takes care of that for you. However, in case you are wondering what is inside such file, it is easy to take a look: SFV files are plain text, so you can open them with your favorite text editor. Here is a screenshot showing the contents of the file we just generated opened in my favorite text editor. (Note: For readability, I have removed some of the lines.) 
Within at SFV file, any line that starts with a ; (semicolon) is a comment. The only lines you really need to care about are the ones that show the name of a data file followed by an 8-digit hexadecimal checksum. For example, consider the line: steal-this-film-2.part01.rar 37DB1B81 This tells you that the CRC32 checksum for the data contained in steal-this-film-2.part01.rar is 37DB1B81. To continue with our uploading preparations, now that we have created the SFV file, we are ready to move on to Step #3: generating the PAR2 error correction files.
© All contents Copyright 2025, Harley Hahn
|
|